Line Items
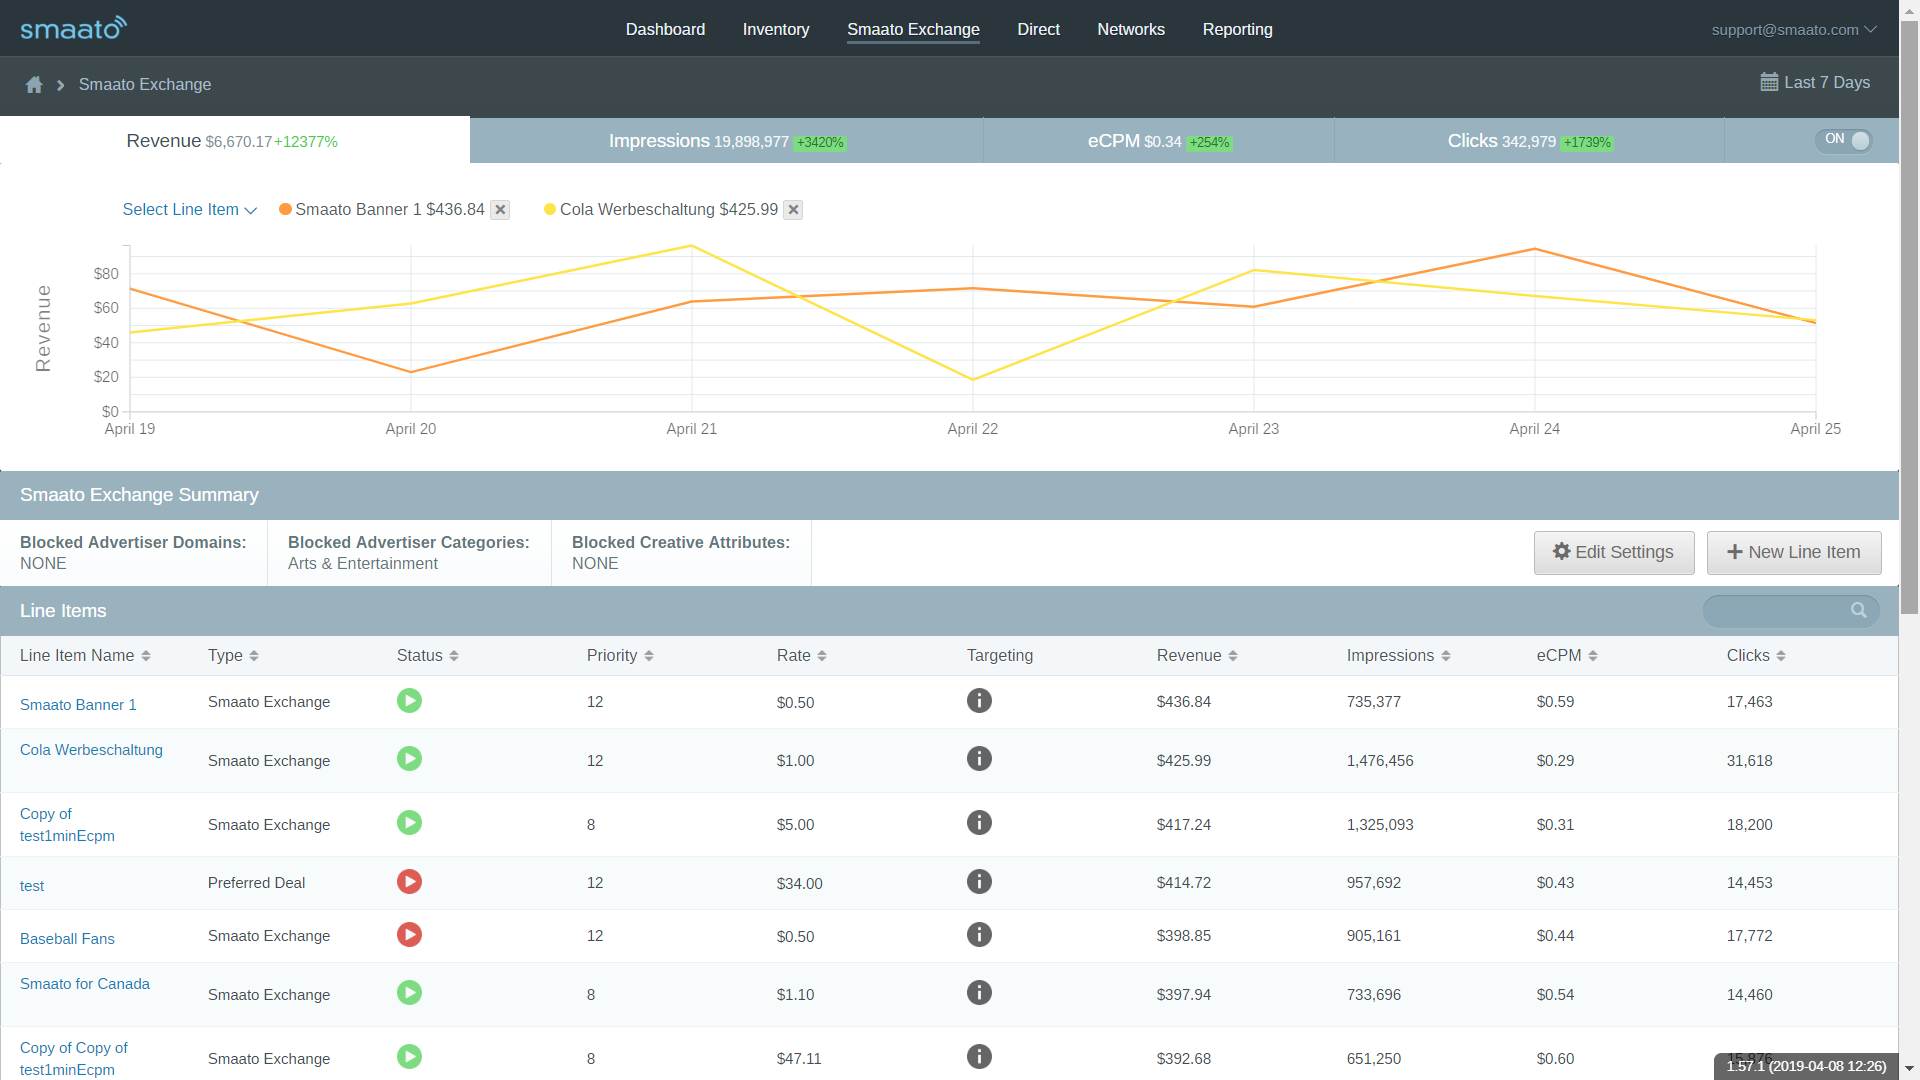
Once you’re logged in to your account (http://spx.smaato.com), click on the Smaato Exchange tab at the top of the page.
Line Items represent demand sources and therefore connect your inventory with ad traffic. ‘SMX’ refers to the Smaato Exchange.
You’ll see an overview of your line items. Once you have set up an app/adspace, you should see the Default SMX Line Item in the overview.
The Default SMX Line Item is automatically created upon initial App setup and guarantees standard SMX traffic for all of your inventory, without any further configuration required. If you’re interested in making use of our advanced targeting options, you can setup custom SMX Line Items.
To create a new one, click “New Line Item”.
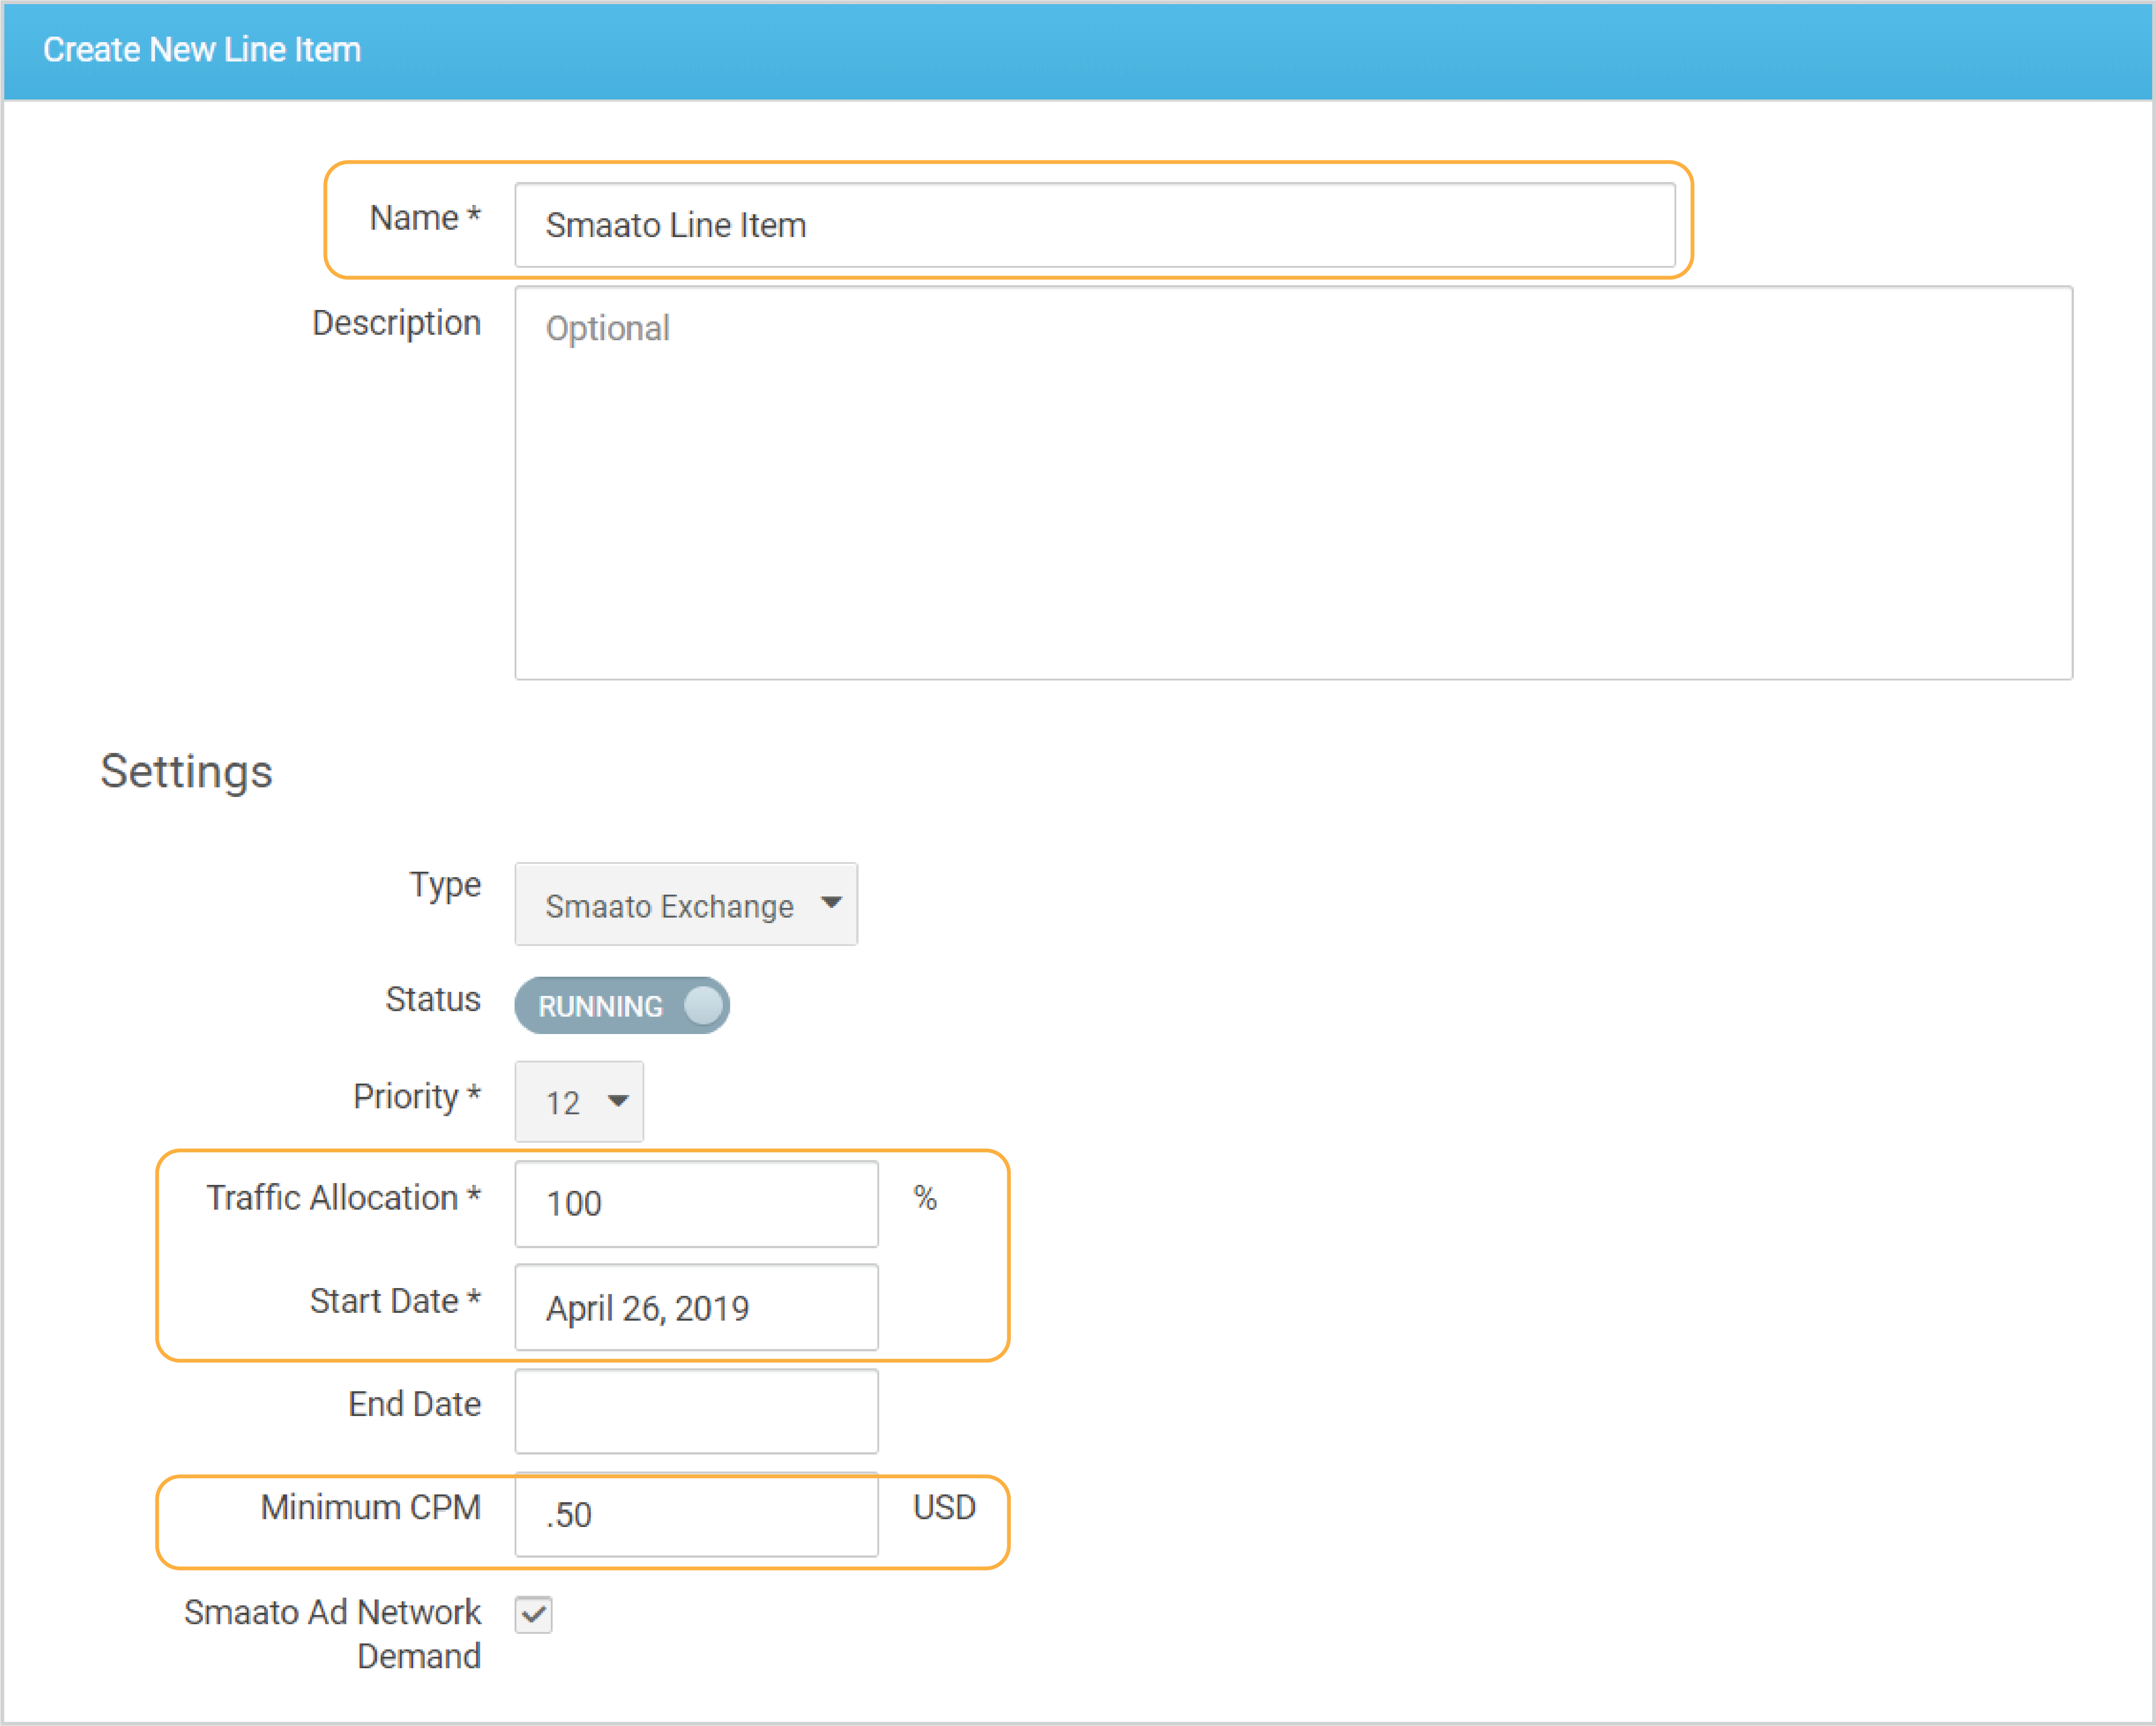
This configuration screen will open.
As a name, we recommend “SMX” and something that specifies the Line Item, i.e. region (“SMX US”).
As a description, just enter “SMX Line Item 1” for now. This description field will come in handy when your setups become more elaborate.
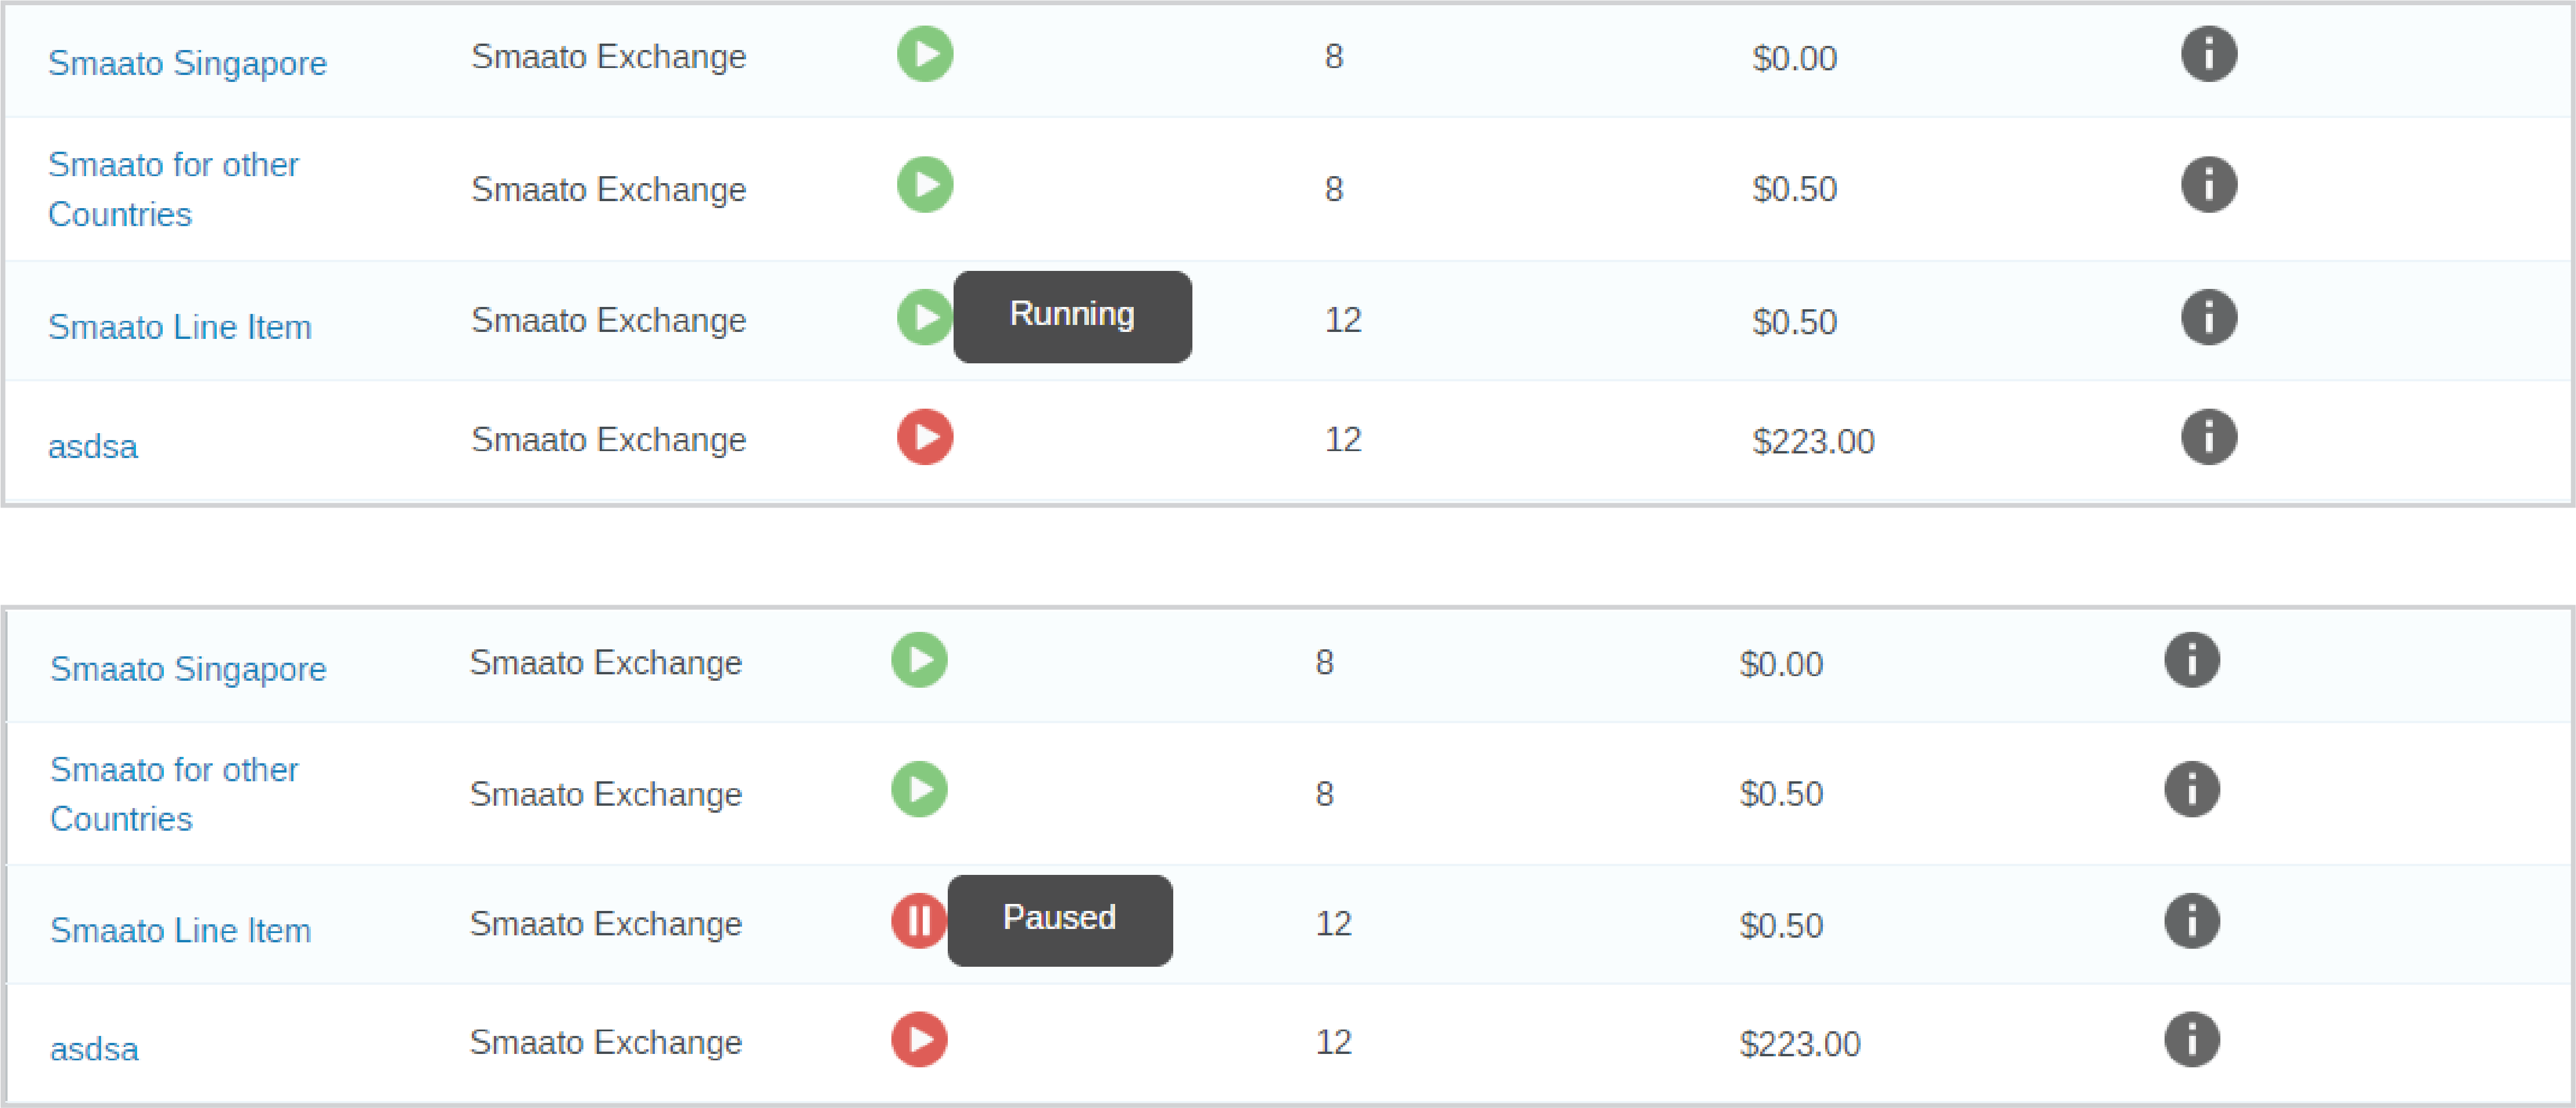
The status is by default set to ‘Play’. We suggest you leave it on “Play” – toggling it sets it to ‘Paused’, which in practice only makes sense if you’re setting up an adspace that you want to go live later (i.e. for release dates).
The priority defines the line item’s priority – so it defines the priority of this demand source configuration. Choose “Default” for now. As additional Line Item types and configurations will be added in the future, we will elaborate on setting Line Item priorities.
Unless you’re clearly intending on allocating traffic partially, leave Traffic Allocation at 100%.
Set the current date as the Start Date. If you don’t have a planned End Date, just leave that one blank for the time being.
You can choose between a “Floor Price” and “Targeted eCPM”. The option “Floor Price” will treat the value you set as the minimum amount of money you want to receive per 1000 ad impressions on your app or site for each single ad impression. If you select “Targeted eCPM”, it will be the value as the minimum you want to achieve on average.
Normal Floor Prices are 0.10 USD, 0.50 USD or 0.80 USD. If you’re not sure what to set, set it to 0.10 USD to start off (raising the Floor Price may improve monetization yield, but can also substantially reduce your fill rate.).
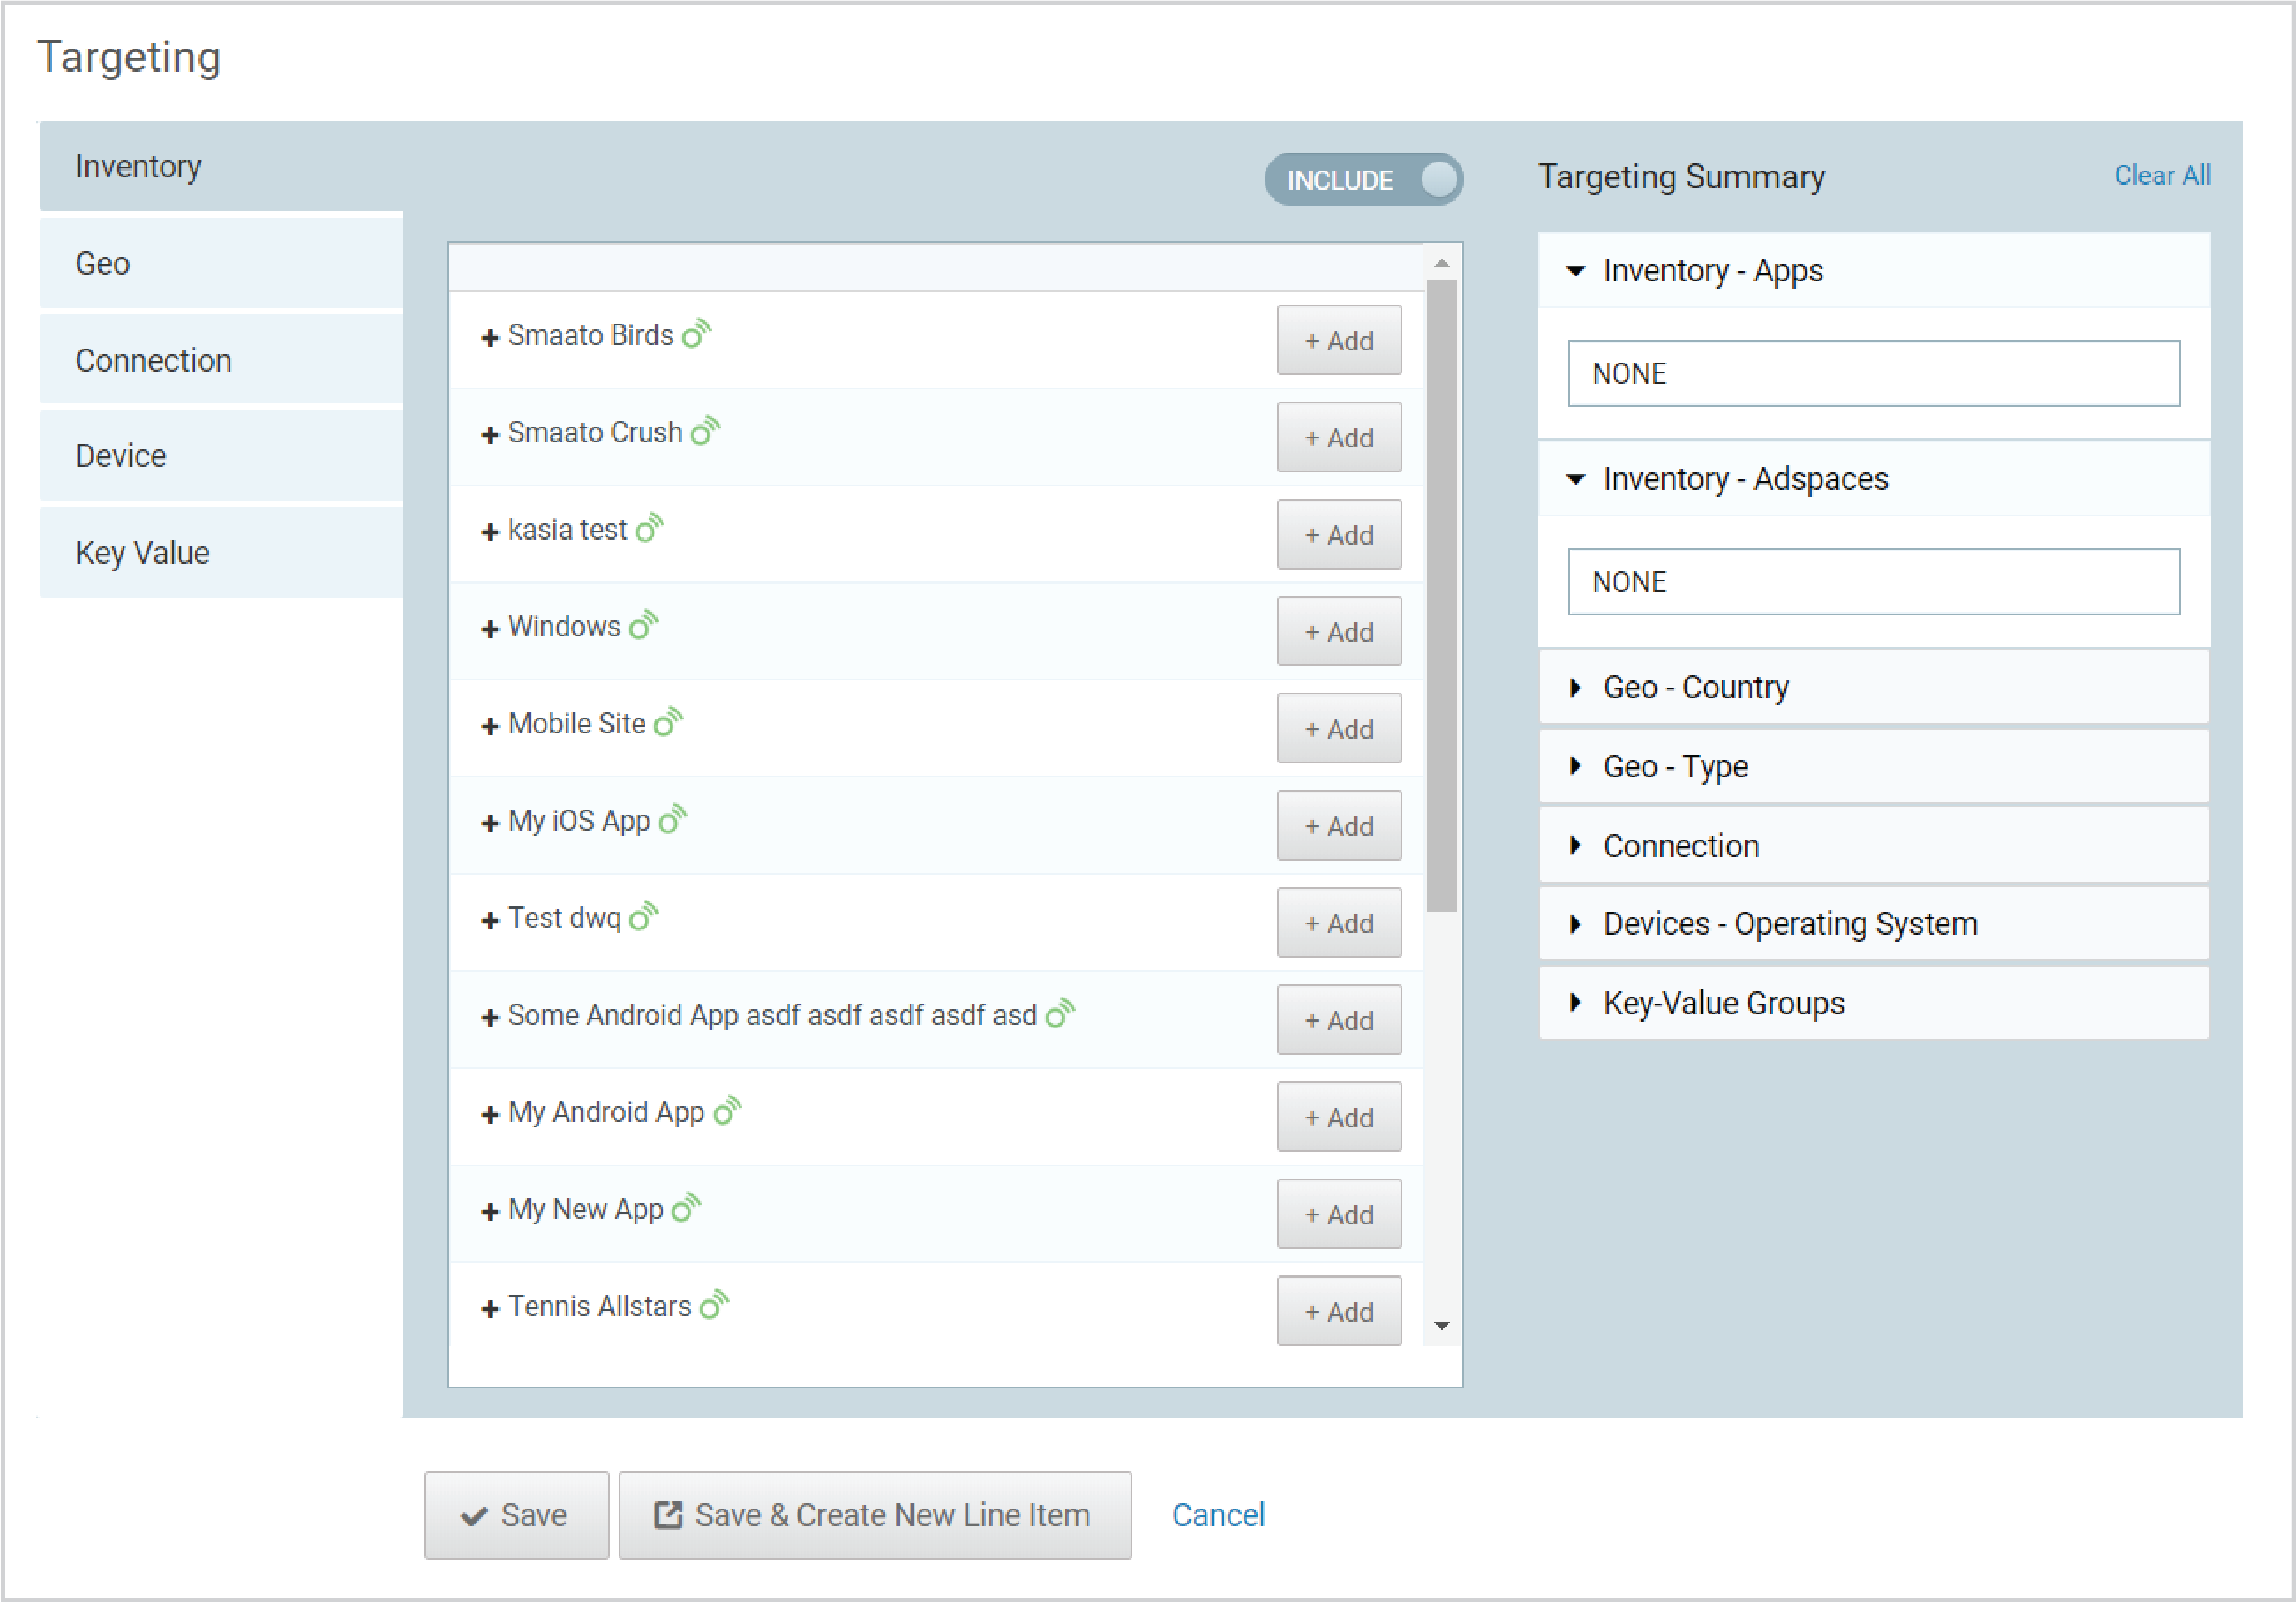
For now, the only setting you’ll need is the “Inventory” tab: This is where you connect the line item to an App (and accordingly, to an Adspace).
If you click the “+ Add” button next to the App or Site instance you want to associate, it will move over into the right column, into the Targeting Summary.
Side note: You may have noticed the green (and red) icons next to the instances. These represent whether an instance is ready to go live or not. If an app or adspace isn’t eligible for Smaato Demand or doesn’t have an Adspace set up yet, it is shown as status ‘red’.
As mentioned before, the “Inventory” configuration depends on your preference; for starters, we’d suggest you associate the whole App or Site instance (as shown in Step 5).
When you’re done, hit “Save”.
Now your line item configuration is populated. You can see the line item you just created appear in the list, and a curve in the graph.
You’ve just created your first line item setup. Congrats, you’ve done it!
The status is set right to live, so you should see ads on your adspaces within an hour.
Last Modified: November 25, 2021 at 4:07 pm